How do you lease a wheelchair van in Canada? If you’re asking that, there’s a good chance you’re feeling stuck. You’re trying to move people safely across long distances, tight schedules, or rural roads, and your current setup isn’t keeping up. Transportation barriers remain one of the top reasons people miss medical appointments across the country. That means missed care, lost trust, and added stress for your team. You’re carrying the weight of wanting to do more, while resources feel stretched thin. The good news is, when you find the right leasing path, you can expand access, reduce wait times, and bring dignity back into every ride.
At MoveMobility, we’ve spent over 20 years working alongside organizations like yours and Liard First Nation to remove those barriers. We’re trusted by healthcare networks, governments, and non-profits across Canada to deliver vehicle solutions that truly fit real-world needs. In the past three years alone, we’ve built over 480 wheelchair vans. We’re also proud recipients of the 2026 DARE Innovation Award, reflecting our focus on progress and impact. That said, we know we’re one of several options out there, and this guide is here to help you make the right call for your situation.
In this article, you’ll learn the five clear steps to lease a wheelchair van and move forward with confidence.
What are the five steps in leasing a wheelchair van?
When you look at how to lease a wheelchair van, the process is more straightforward than it first appears. The key is knowing what comes first and where teams tend to get stuck. Once you understand the steps, you can move faster and avoid delays that impact the people counting on you.
Let’s start with the foundation, because everything that follows depends on it.
1. Fleet planning & needs assessment
Before you sign anything, you need a clear picture of what your program actually requires. This is where many organizations feel pressure. You’re balancing budgets, service demand, and real-world conditions like winter roads in Northern Ontario or long rural routes in Saskatchewan.
A fleet partner or leasing provider will typically walk you through this stage, but your input drives the outcome.
Start with your day-to-day reality: At MoveMobility, we call this a Discovery Call. It’s a focused conversation where you walk through how your program actually runs.
- Who you serve: Seniors, patients, or community members with mobility needs.
- Where you operate: Urban centres like Toronto or remote communities in Nunavut.
- How often you run: Daily routes, on-demand trips, or scheduled medical transport.
- What challenges exist: Long wait times, missed appointments, or limited seating.
For example, an adult daycare centre in British Columbia might need a simple side-entry van for short city trips. Meanwhile, a First Nations community in Northern Manitoba may need a more durable setup that can handle gravel roads and longer distances.
Then, define your vehicle requirements:
- Capacity: How many passengers and mobility devices per trip.
- Access type: Rear-entry or side-entry ramp.
- Interior layout: Seating flexibility for mixed-use trips.
- Climate needs: Higher-capacity heating and cooling systems that hold up in Canadian winters.
Your budget is part of this step too. Leasing a wheelchair van gives you flexibility, but you still need a range that works with your funding or operating model.
To guide your planning, it can help to review resources like the Canadian Urban Transit Association, which outlines accessibility trends and service demands across Canada.
Here’s the gap this step closes: Without clear planning, teams often choose a vehicle that looks right on paper but struggles in real use. That leads to downtime, frustrated staff, and missed service goals.
When you take the time to map your needs upfront, you’re setting your program up for smoother operations and better outcomes for the people relying on you.
From here, the next step is turning that plan and needs assessment into vehicle selection.
2. Vehicle selection & upfitting
Once your needs are clearly mapped, the next step in how to lease a wheelchair van is choosing the right vehicle and configuring it to match your program. This is where your plan starts to take shape in a real, usable way.
You’ll work with a manufacturer or dealer to select a base vehicle and then arrange the upfitting. That means adding the accessibility features and layout that make the van work for your day-to-day service.
Start with the right foundation:
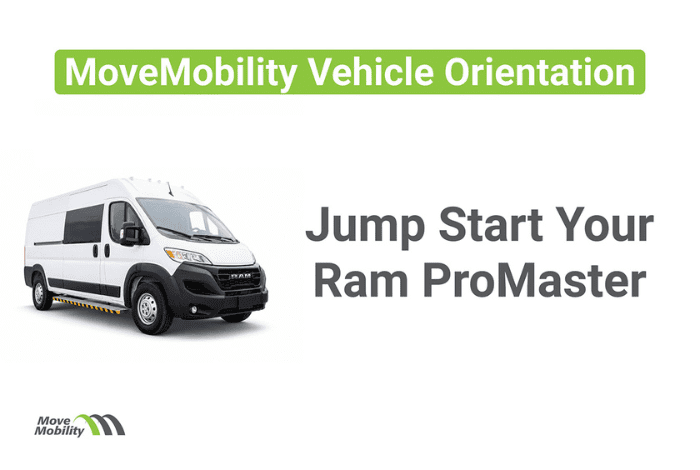
- Chassis choice: Cargo van platforms like the RAM ProMaster or Ford Transit are common in Canada.
- Drive conditions: Front-wheel drive options and the Trail Edition upgrade can help with traction during winter months.
- Serviceability: Access to local maintenance support can save you time later.
From there, upfitting brings the vehicle to life.
Customize based on real use:
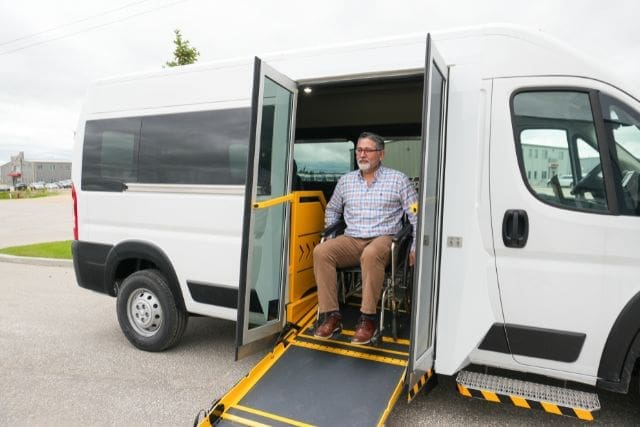
- Ramp or lift systems: Rear-entry ramps are often simpler for tight urban parking, while side-entry can support smoother curbside access.
- Seating layout: Flexible seating lets you switch between ambulatory passengers and wheelchair users.
- Securement systems: Proper tie-downs and restraints keep passengers safe and comfortable.
- Interior features: Comfort, lighting, and storage all play a role in daily operations.
Let’s say you’re running a non-emergency medical transport program in Alberta. You might need a layout that supports two wheelchairs and extra seating for caregivers. On the other hand, a community outreach team in Northern Quebec may prioritize durability and interior warmth over higher passenger counts.
Here’s where gaps can show up: If the vehicle isn’t matched to your environment or usage, small issues add up fast. Tight layouts slow down loading. Poor heating impacts comfort during winter. Limited flexibility can reduce the number of people you can serve each day.
Working closely with your upfitting partner helps you avoid those setbacks. It keeps your program running smoothly and supports a better experience for every passenger who steps inside.
3. Delivery & driver handover
After your vehicle is built and ready, the next step in how to lease a wheelchair van is delivery and getting your team comfortable behind the wheel. This stage often gets overlooked, but it plays a big role in how smoothly your program starts.
During production, you’ll usually have a point of contact keeping you updated. That consistency helps reduce confusion and keeps timelines clear while you wait for your van to be completed.
What happens leading up to delivery?
- Progress updates: You’ll receive status updates as your vehicle moves through production.
- Final checks: Quality control and safety inspections are completed before it leaves the facility.
- Delivery coordination: Timing, location, and contact details are confirmed with you.
In Canada, delivery can vary depending on your location. A van heading to downtown Calgary may arrive quickly, while a unit going to Northern Ontario or a remote First Nations community might take longer due to distance and road conditions.
Once the vehicle arrives, the focus shifts to your team.
Driver handover and training:
- Walkthrough session: The manufacturer or provider will guide you through the vehicle’s features.
- Ramp operation: Hands-on training for safe loading and unloading.
- Securement systems: How to properly secure wheelchairs for transport.
For example, if you’re managing a seniors’ transportation program in Nova Scotia, your drivers may need to learn how to operate the ramp efficiently during tight schedules. A clear walkthrough helps build confidence right away.
What gap does this step close? Without proper handover, teams often feel unsure about using the equipment. That hesitation can slow down service and create safety risks.
A strong delivery and training process gives your team confidence from day one. It helps you deliver safe, respectful transportation that people can rely on.
Next, we’ll look at how your vehicle stays supported long after it hits the road.
4. Fleet operations & management

Once your vehicle is on the road, the next step in how to lease a wheelchair van is keeping everything running smoothly day in and day out. This is where operations and management come into play. It’s not about the van itself. It’s about how well your program performs over time.
This step helps you stay organized, reduce downtime, and keep your team focused on serving people.
Build a system that supports your team:
- Roadside assistance: Get support quickly if something goes wrong on the road.
- Maintenance program: Stay ahead of wear and tear with scheduled service.
- Fuel cards: Monitor fuel costs and simplify expense tracking.
For example, imagine you’re running a transportation program in rural Saskatchewan. Long distances and fewer service stations can create risk. With telematics and roadside support in place, you can respond faster if a vehicle breaks down and keep your schedule on track.
Or picture a busy adult daycare centre in Ontario. A maintenance program helps you avoid last-minute repairs that could cancel trips and leave people waiting.
Here’s the gap this step closes: Without a clear operations plan, small issues can turn into major disruptions. Missed maintenance leads to breakdowns. Lack of tracking makes it harder to manage costs. Delays start to impact the people who rely on you.
With the right systems in place, you gain control. Your team stays confident, your vehicles stay reliable, and your service stays consistent.
Before we move into the next step, it helps to be prepared for the unexpected.
Want a simple way to stay ready on the road? Click the button below to download our roadside assistance guide and give your team a clear plan when it counts.
5. End of term options
As your lease comes to a close, the next step in how to lease a wheelchair van is deciding what comes next. This stage gives you flexibility, and your choice should reflect how your program has evolved.
Your needs today may look different from when you first started. Maybe your ridership has grown. Maybe your routes have changed. This is your chance to adjust without starting from scratch.
You’ll typically have three options:
- Return and replace: Hand the vehicle back and lease a new one with updated features or layout.
- Extend the lease: Keep the same van for a longer term if it’s still meeting your needs.
- Buyout the vehicle: Purchase the van at the end of the lease and keep it in your fleet.
Let’s say you’re a community organization in Alberta, and demand has increased over the past few years. Returning the vehicle and upgrading to a larger or more flexible layout could help you serve more people.
On the other hand, if you’re a smaller program in Prince Edward Island and your current setup still works well, extending the lease may be the simplest path forward.
A buyout can make sense too. If the vehicle has been reliable and fits your operation, owning it outright can reduce long-term costs.
Here’s the gap this step closes: Without a clear plan at the end of your lease, you risk service interruptions or rushed decisions. That can lead to downtime or added pressure on your team.
When you plan ahead, you stay in control. You can align your next move with your goals, budget, and the people who rely on your service every day.
Curious about leasing a wheelchair van in Canada?
You came here because you’re trying to figure out how to lease a wheelchair van without making a costly mistake or slowing down your service. You’re feeling the pressure of missed trips, limited capacity, or a system that just isn’t keeping up.
Here’s what you now understand:
- The process: Six clear steps from planning to end-of-term decisions.
- The gaps: Where programs often struggle and how to avoid delays.
- The path forward: How leasing a wheelchair van can bring more stability and reach to your service.
At MoveMobility, we’ve spent two decades working alongside teams like yours who are trying to do more with limited resources. Our approach is simple. We listen first, then build around your reality. After 20 years in the industry and hundreds of vehicles delivered across Canada, we’ve seen how the right solution can transform a program from reactive to reliable. We stay involved long after delivery because your success on the road is what matters most to us. If you have questions or want to explore your options, click the button below to talk to a mobility expert.
If you’re not ready to talk just yet, that’s completely fine. We’ve got a few helpful resources to guide your next step.
What should you read next?
- How to Choose a Wheelchair Van (11 steps): Learn how to match a vehicle to your program so you avoid costly mismatches early.
- How to get wheelchair van funding: Understand where funding comes from and how to improve your chances of approval.
- How much does a wheelchair van cost? If you’re still interested in purchasing a wheelchair van outright, this article will help you understand costs.